

How To Repair Dash Lights On A 95 Chevy Monte Carlo
Vehicle dashboard lights assist the driver in monitoring the various gauges of their auto. These of import lights include the speedometer, the fuel and temperature gauges among others. Having these lights work properly is peculiarly useful when driving at nighttime.
Cleaved dashboard lights can leave you clueless to whether your vehicle is experiencing engine bug, such as running out of gas or overheating, often until it is too late. Therefore information technology is important to have your dashboard lights working properly.
If you are experiencing your dash lights not working, there are a few things we tin do to get them working on your own that tin can easily be performed at dwelling.
Role one of 3: Test the dimmer switch
The dimmer switch may have been pressed past accident or adjusted by some other driver of the vehicle causing the dashboard lights to become dull or switched off.
Step 1: Locate the dimmer switch. Outset with locating the dimmer switch for the dashboard lights.
- Tip: If y'all are having difficulty locating it, refer to your vehicle's possessor manual.
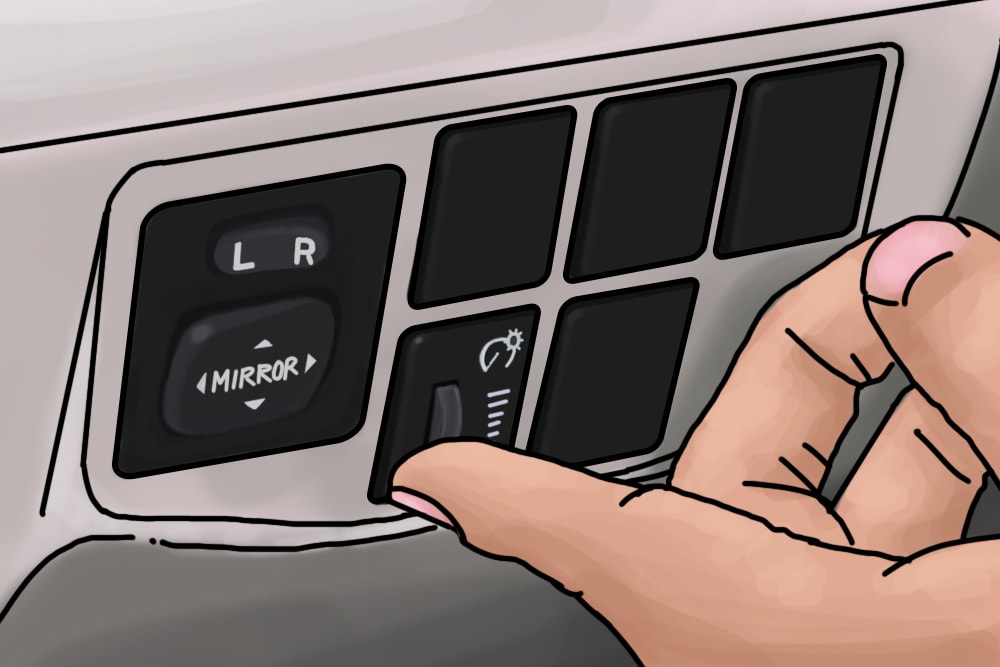
Step 2: Adjust the dimmer switch. After locating the dimmer switch, plow the key to the second position and turn on the headlights. Press the switch and see if the dashboard lights become brighter.
If the dashboard lights practise not come one even after adjusting the dimmer switch, the dashboard light fuses may take blown.
Part of 2 of iii: Check and replace fuses
Materials Needed
- Fuse puller or needle nose pliers
- Replacement fuses
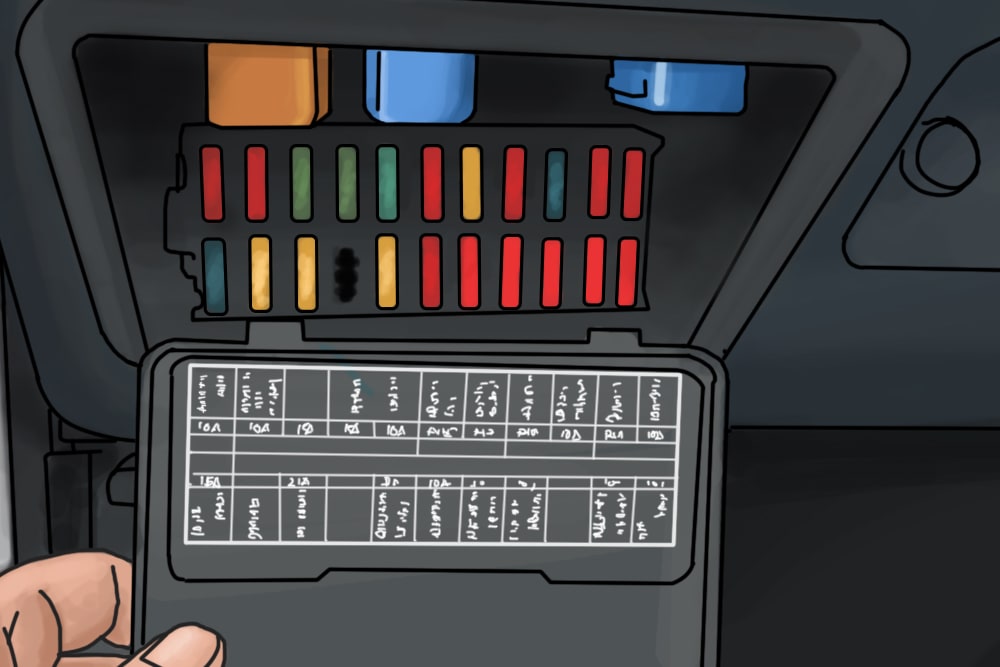
Step 1: Locate the fuse for the dashboard lights. This fuse will be located inside ane of the fuse boxes for the vehicle.
The fuse boxes may be subconscious under the hood nearly the engine or tucked away nether the dashboard. Refer to the possessor'due south transmission of your car if you are having problem locating the fuse.
- Notation: When removing fuses from the fuse box, always have the key turned to the naught position on the ignition. This cuts the ability to well-nigh fuses in the fuse box, making it condom to service them.
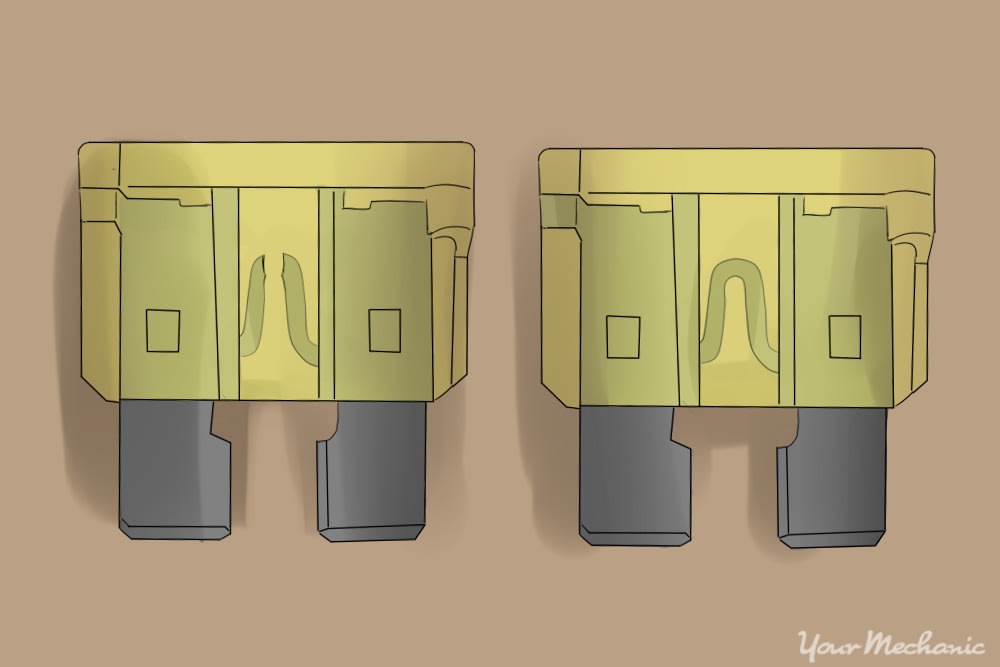
Step two: Remove and audit the fuse. Utilize a fuse puller or a pair of needle nose pliers to remove the dashboard light fuse and visually inspect it for any harm.
Step three: Replace damaged fuses. If the fuse is apparently damaged or faulty, replace it with a new fuse of the aforementioned type and amp rating.
Starting time your car and check again to see if the dashboard lights are functioning properly.
Part of 3 of 3: Cheque the approximate cluster
If your dashboard lights are withal not working or if one or more bulbs in the approximate cluster are non working, remove the gauge cluster from the dashboard and check the electrical connections and bulbs.
Materials Needed
- Fuse puller or needle nose pliers
-
Screwdriver or a modest ratchet with a 7mm or 8mm socket
-
Note: The following steps are a general guide to removing the gauge cluster from the dashboard for servicing. Some of these steps or the tools needed tin can vary from one manufacturer to another, and then it is recommended that y'all refer to your vehicle's service transmission for the exact procedure for your vehicle.
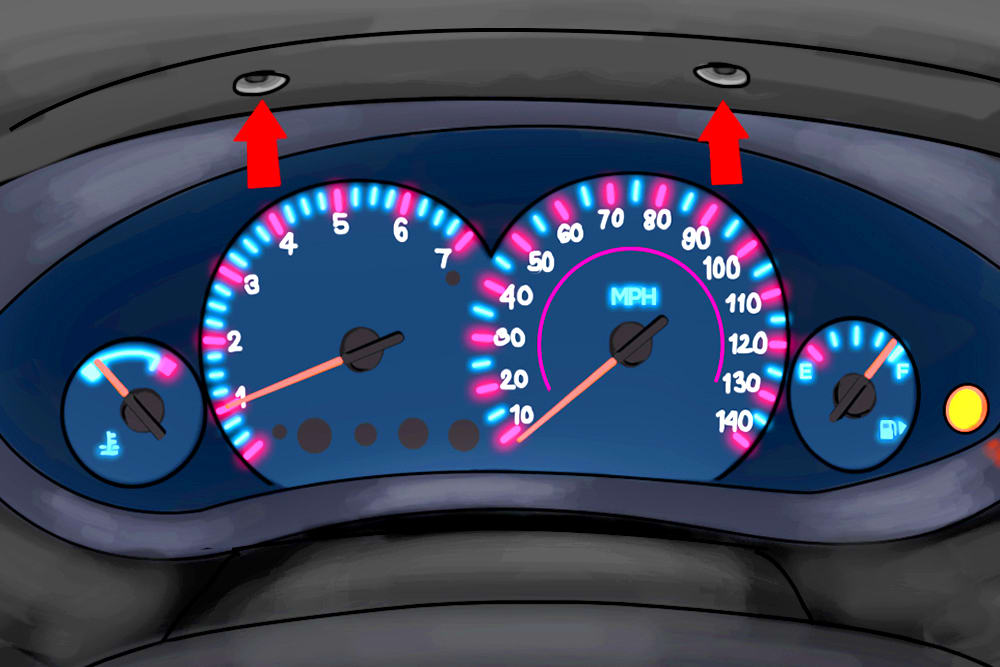
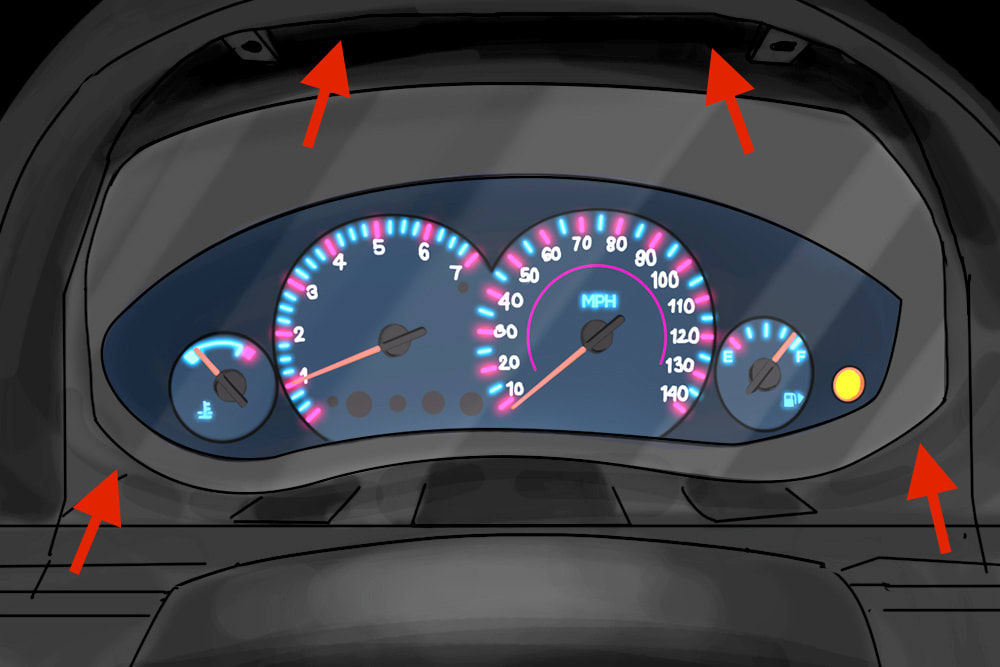
Footstep 1: Remove the trim around the judge cluster. Remove the beautification trim panel from around the the gauge cluster by either popping the mounting clips open or by loosening the mounting screws that attach it to the dashboard.
This console tin can exist removed with a screwdriver or a modest ratchet with a 7mm or 8mm socket.
Step two: Remove the fasteners. With the gauge cluster now exposed, locate the fasteners, loosen and remove them using the appropriate tools.
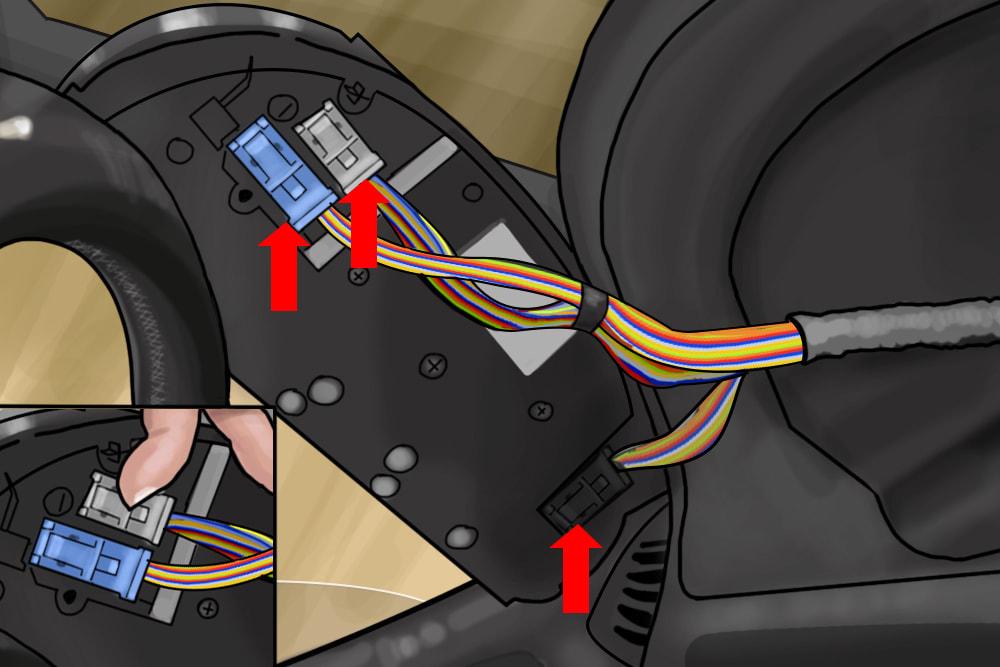
Footstep 3: Remove the gauge cluster. Unplug the multiple electrical connectors that adhere the judge cluster to the wiring harness. Accept care to disconnect all connectors and so remove it completely from the dashboard.
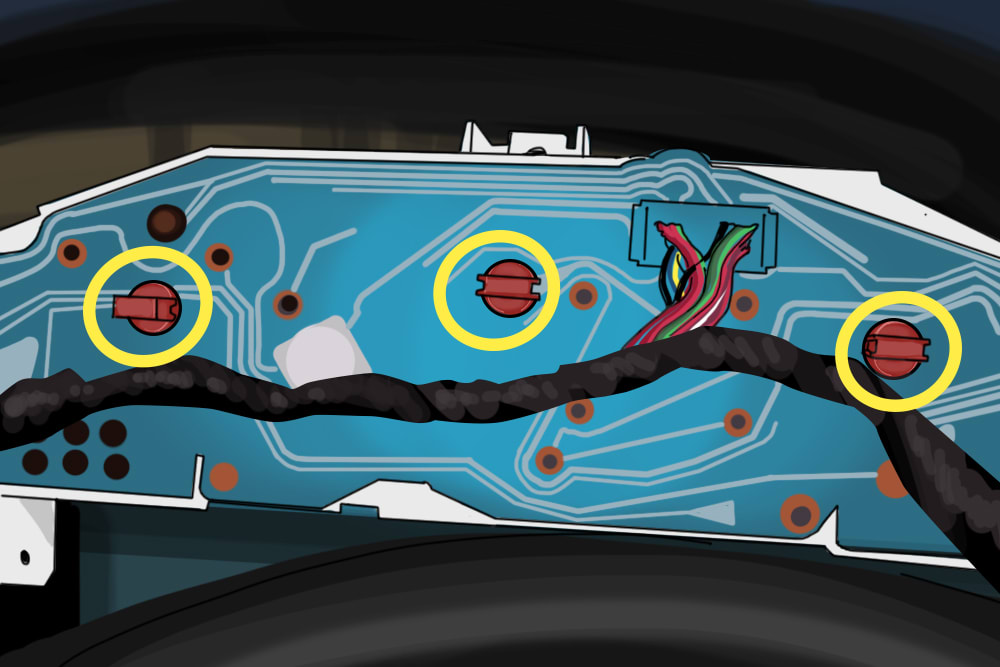
Footstep 4: Remove the bulb socket. With the gauge cluster removed, you will see black, gray, ruddy or blue bulb sockets on the back. You tin can hold a socket, twist it to take information technology out, and inspect each light seedling for damage.
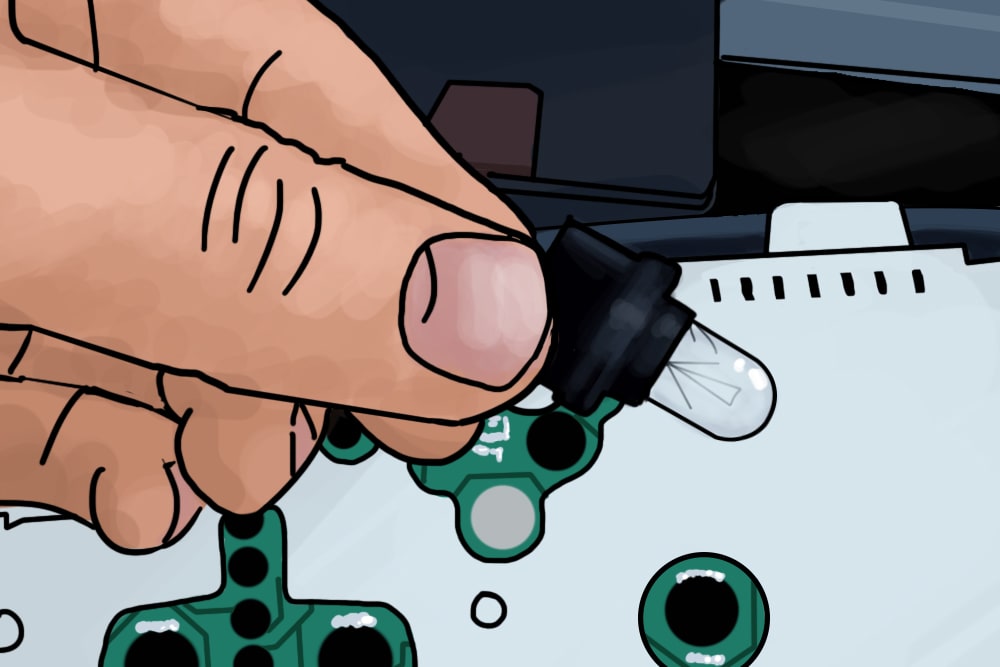
Step 5: Replace broken bulbs. If a bulb is cleaved or faulty, replace it and install the socket back into its cavity.
- Tip: If burnt out bulbs are plant in the gauge cluster, it'southward a good idea to alter all the bulbs. This will ensure y'all don't take to do this again in the most hereafter.
Step 6: Reconnect the guess cluster. Afterwards inspecting and replacing bulbs as needed, reconnect the electrical connectors to the approximate cluster and slide information technology back into its cavity.
Secure the gauge cluster with its fasteners and call back to re-install the beautification trim panel equally well.
Step vii: Test the lights. Switch on your car and bank check to see whether your dashboard lights are working properly.
If the dashboard lights are still non illuminating or if you don't feel comfy attempting this process, enlist the services of a certified mechanic to replace any blown fuses and supersede the light bulbs for you.
The statements expressed to a higher place are only for informational purposes and should be independently verified. Please come across our terms of service for more than details

How To Repair Dash Lights On A 95 Chevy Monte Carlo,
Source: https://www.yourmechanic.com/article/how-to-repair-dashboard-lights-by-rocco-lovetere
Posted by: byrdbefer1969.blogspot.com
0 Response to "How To Repair Dash Lights On A 95 Chevy Monte Carlo"
Post a Comment